THE 1963 THUNDERBIRD ITALIEN
Chapter 27 - SEWING THE INTERIOR
Copyright © Thomas Maruska 2008
All Rights Reserved
This was an entirely new experience for me.
I used to install floor coverings for a living when I was a bit younger
and as such, I used to wear holes in the knees of my jeans
all the time.
I purchased a portable Singer sewing machine and became quite good at
sewing patches on my jeans.
That's the only sewing I had ever done in my life
until now...
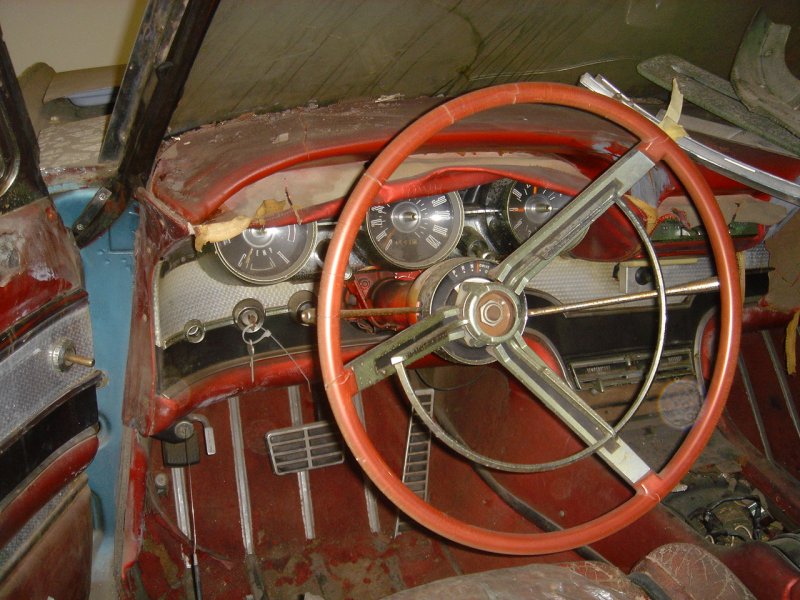
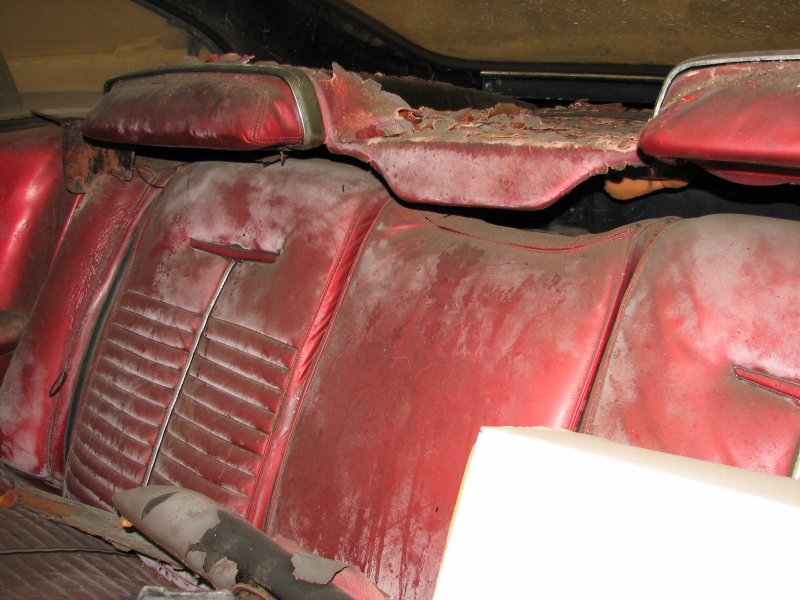
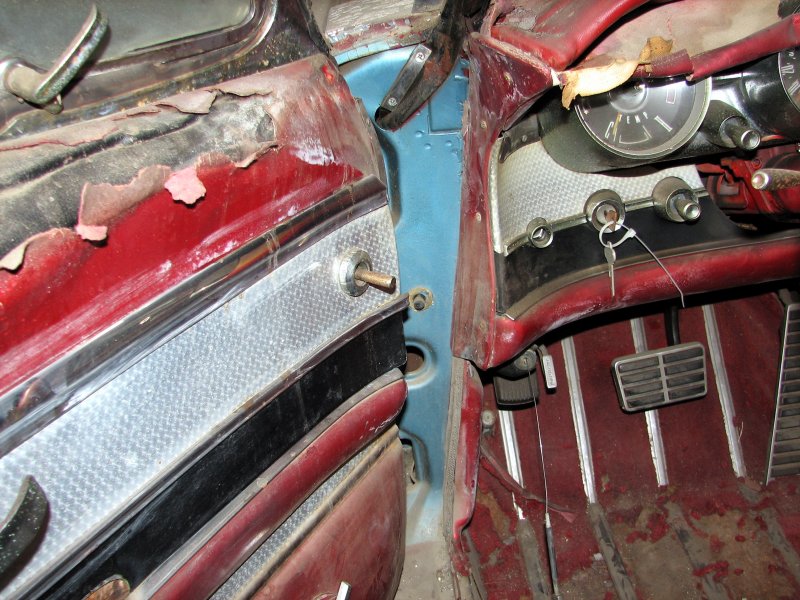
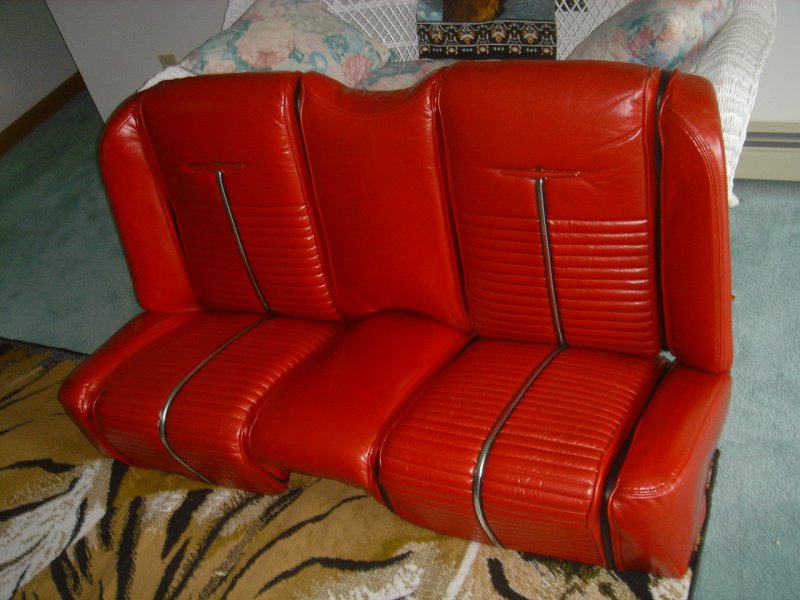
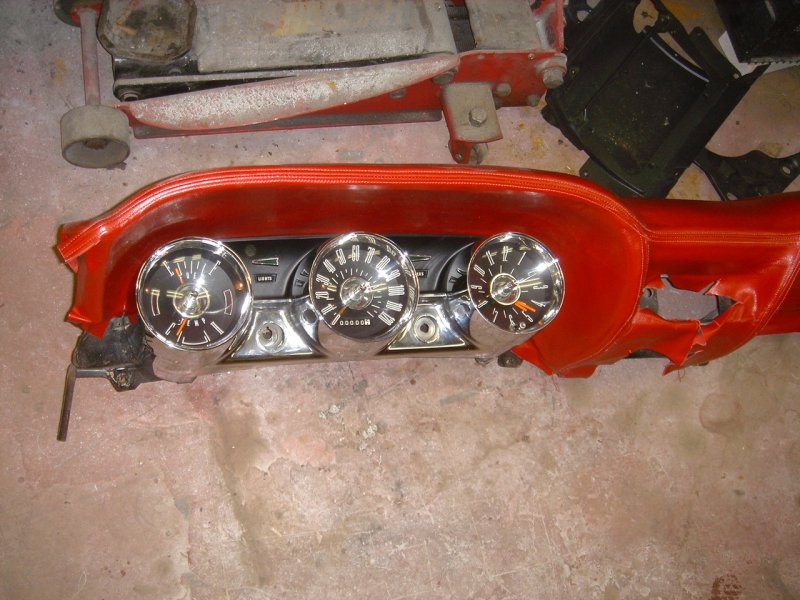
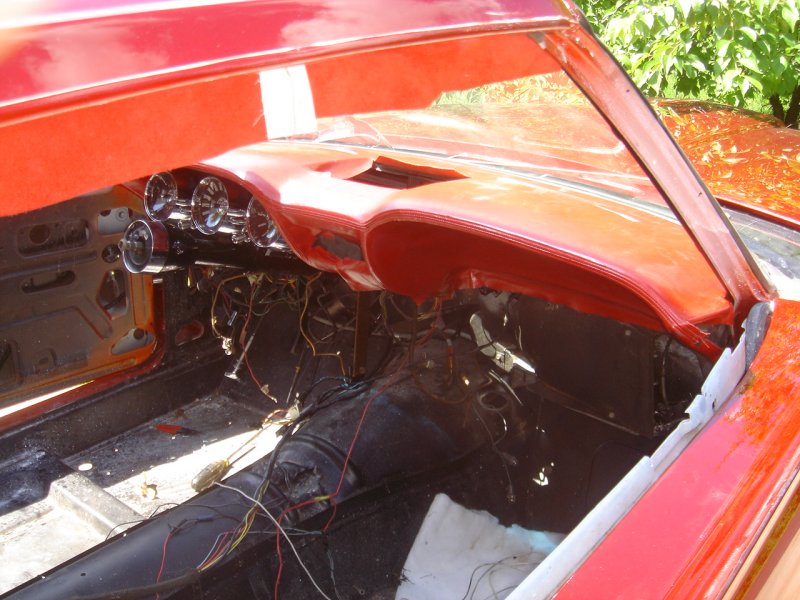
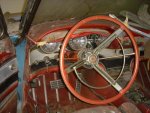
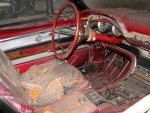
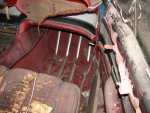
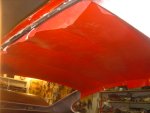
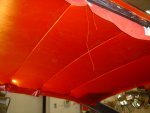
Here are a few pictures of the Italien's interior when I got the car.
This is what the hot California sun baking in through the windows
of the Italien over the years did to the beautiful leather interior.


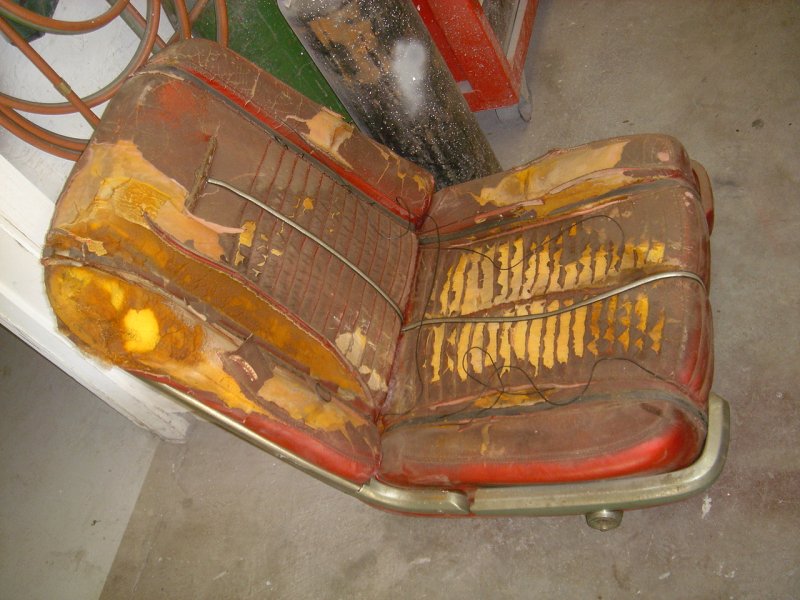
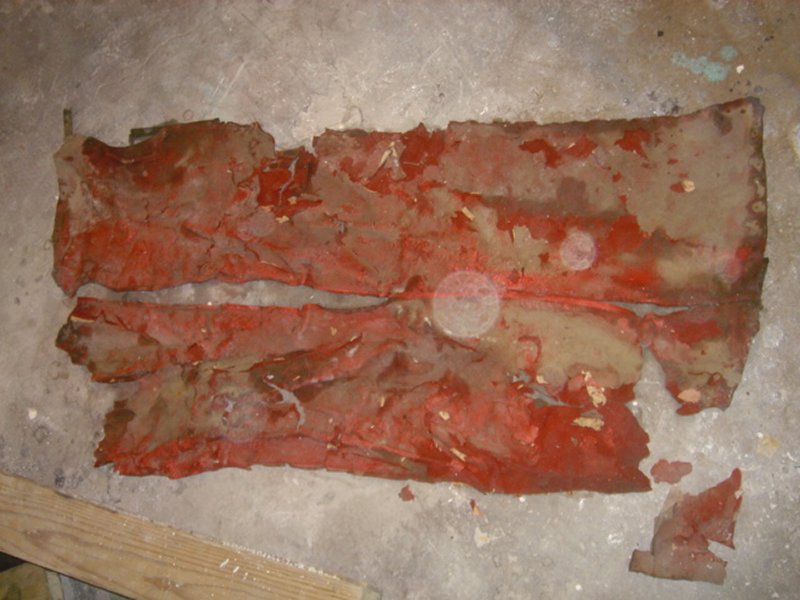
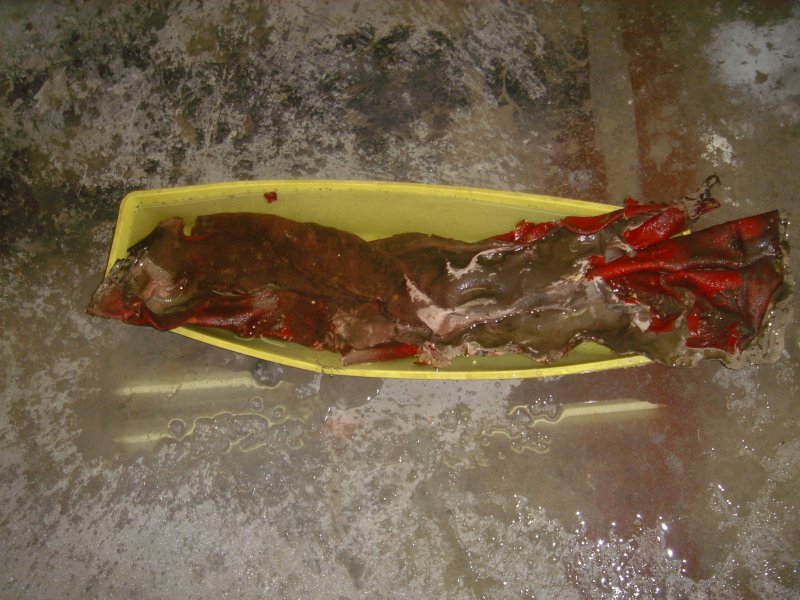
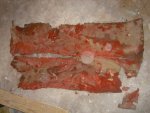
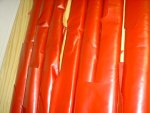
The picture on the left is a section of the original leather headliner
that I
found balled up in the trunk of the Italien. I soaked it for a
couple
days in a wallpaper tub so that I could unfold it and see how it was
put together.
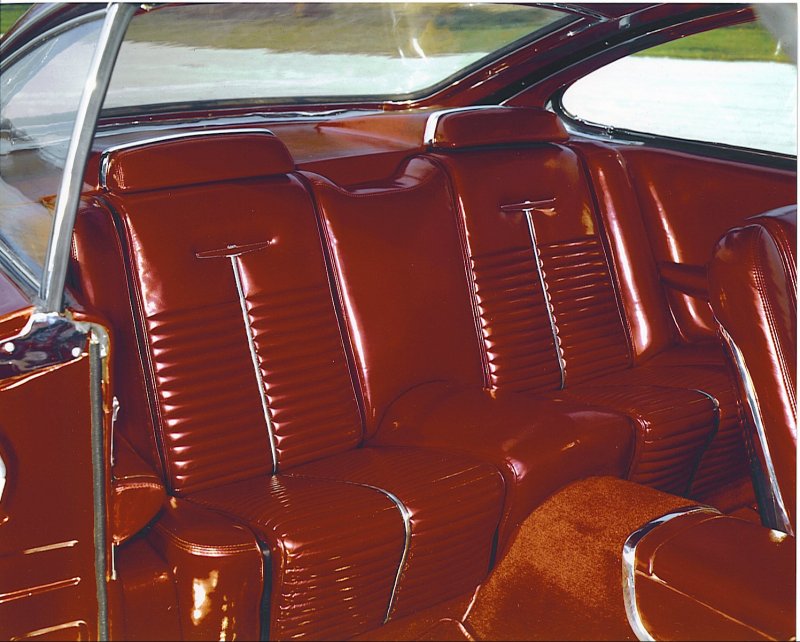
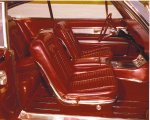
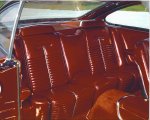
I sent the following two pictures of the interior of the Italien
when it was new in 1962
that I got from the Ford Archives Department to an upholstery shop in
Minneapolis
and asked them if they could give me a ballpark idea of what it would
cost to
make new seat covers to match the pictures.
When they got back to me with the price it was unbelievably outrageous,
AND
the cost of the leather wasn't included!!
I thought to myself, "Boy, for $XX,XXX.XX I can f*** up a lot
of leather!
Keep in mind, that didn't include the dash, door panels,
rear quarter panels, rear window shelf and headrests,
headliner, knee bumpers, kick panels, console sides and cover,
seat skirts or front and rear arm rests, all of which are covered with
leather.
And don't forget, the carpet is bound on the edges with leather too!
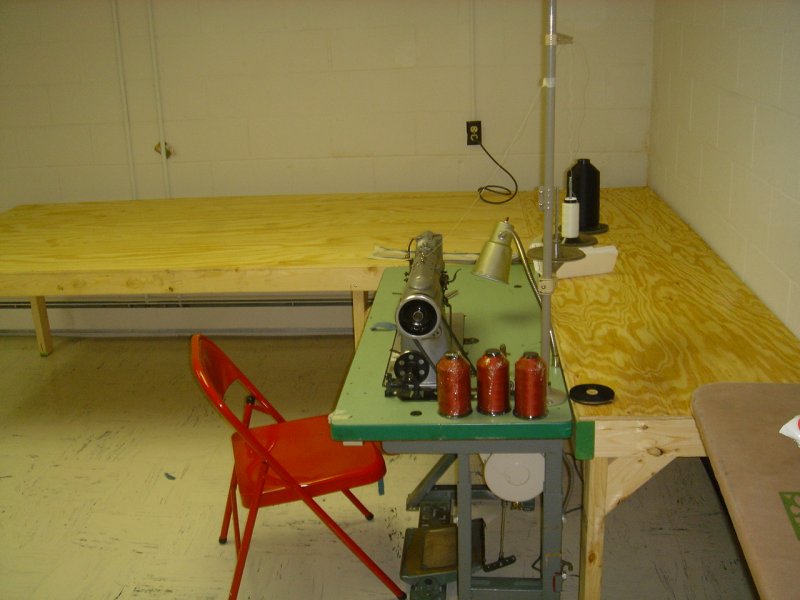
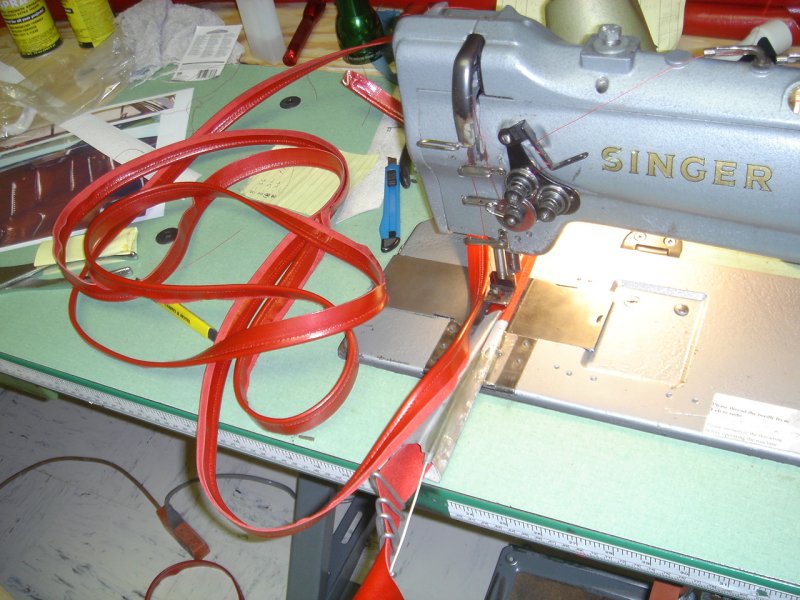
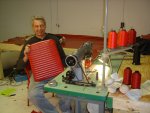
I went searching on ebay for commercial 2 needle sewing machines
with 3/8" spacing between the needles.
The 2 needles are needed for sewing the french seams on Thunderbird
seat covers.
The spacing on the Italien seat cover french seams is 3/8" which is
slightly wider than the 5/16" spacing on the production birds.
I found a nice old (1967) Singer machine which you can sew with one or
both needles
and started bidding on it. I was aggressive and ended up winning
the bid for around
$650.00, a great buy in my opinion, especially now having used the
machine.
It worked flawlessly for me.

Then I cut a piece of the original leather off the
back seat bottom
from the back underside that had never see light
and sent it in to Midwest Leather so they could custom
dye new leather to match it. After a week or two they sent me a
couple of strike offs,
or samples they had dyed for me to select from.
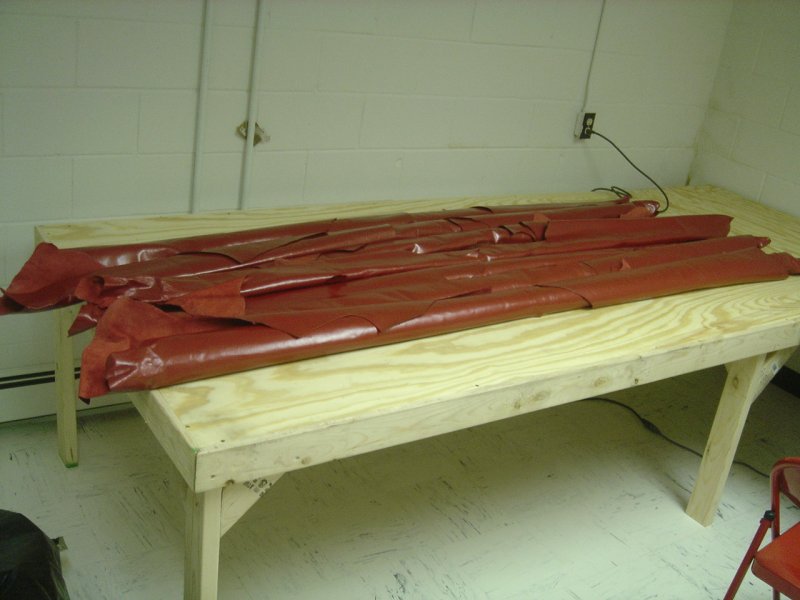
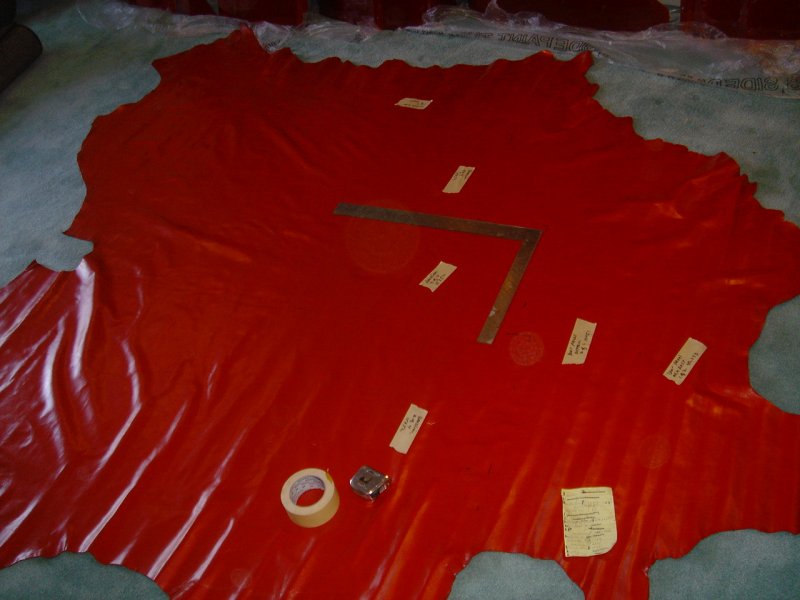
I picked the best match and placed the order for seven full hides of
leather.
I did a lot of calculating to determine how much leather
to get and then added a little for good measure.
I anticipated having nearly a full hide left over if I didn't botch up
too much of it.
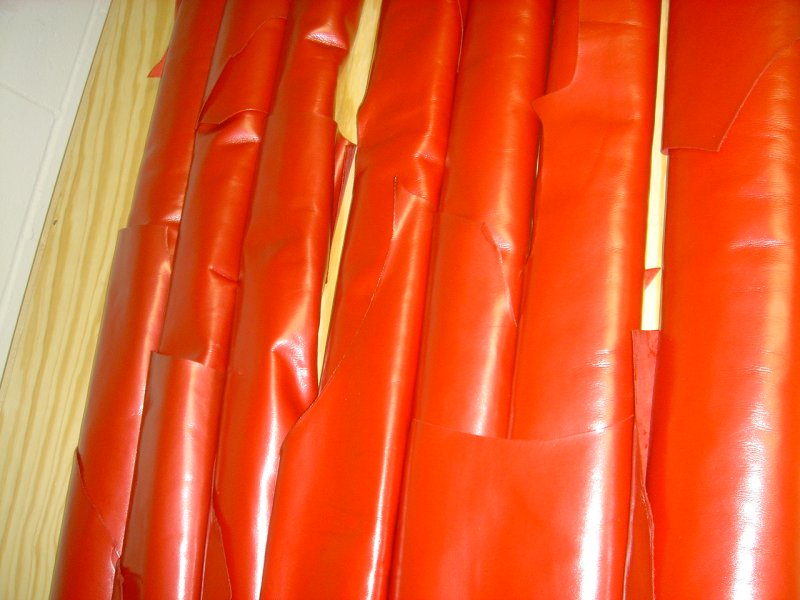
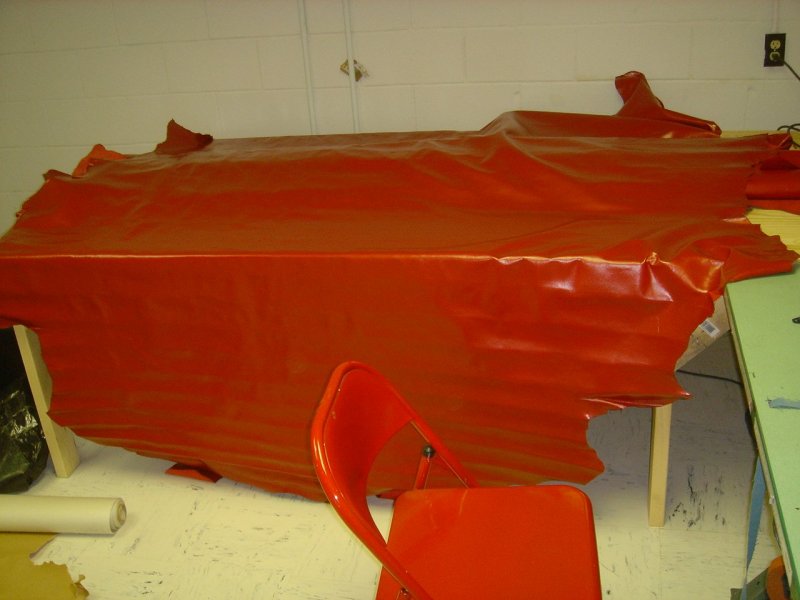
After about 4 weeks, the leather arrived,
and it was beautiful!


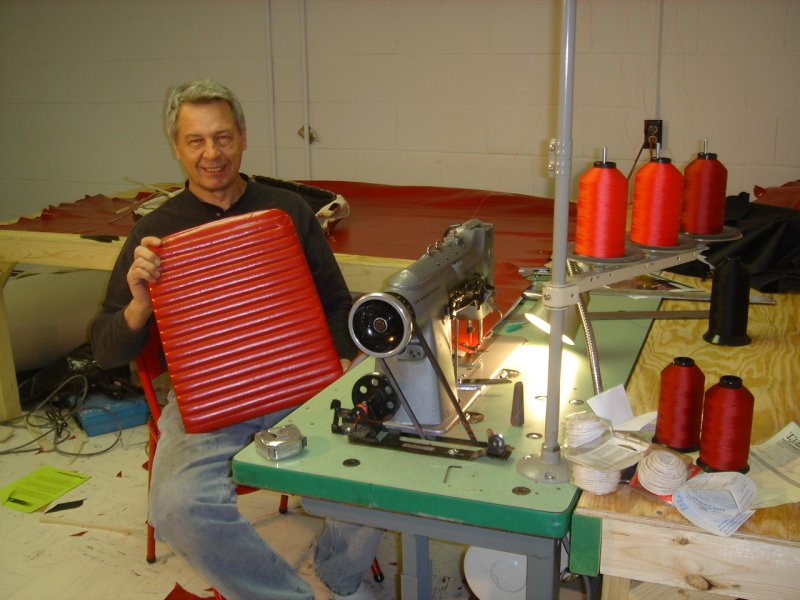
I picked up som 1/2" thick upholstery foam from a local Upholstery shop
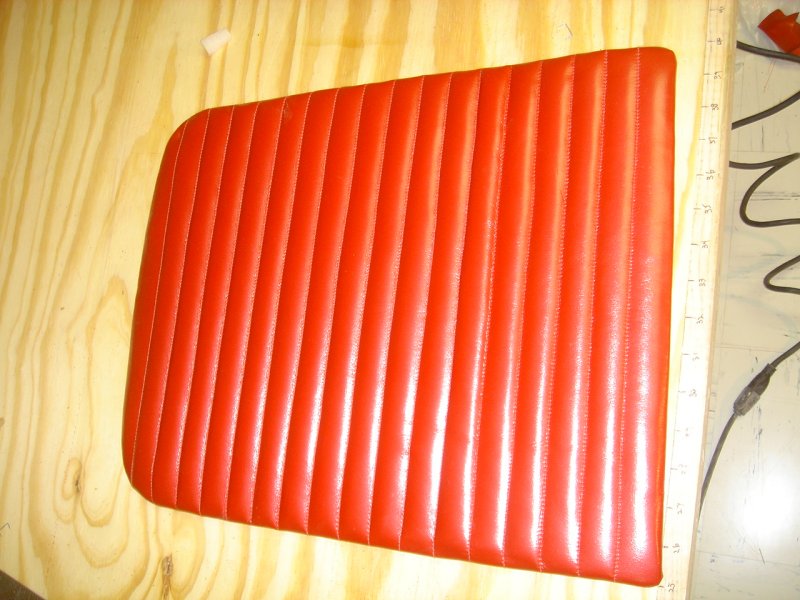
and went to work. I started with the easiest parts first, and
they were the
pleated seat backs. After cutting out a piece of leather for the
seat back,
I laminated it to a piece of foam with a small amount of spray
adhesive. Then I lightly scratched lines on the face
of the leather one inch apart with an awl
over which I sewed the pleating.
These peices were simple enough to make and definately boosted my
confidence with the wonderful results!

Then I measured the large pieces and cut them out of the hides
leaving the small pieces to cut from scraps

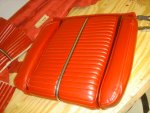
Next I sewed the pleating into the seat bottom and back center sections
and applied the chrome plastic strip down the centers.
This is sewn on with both needles, one on each edge of the chrome into
the groves in the black plastic.
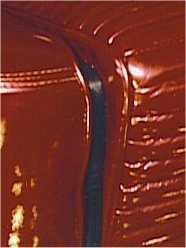
Now when I was about to start sewing pieces together I had another
hurdle to cross.
As you can see in this detail section, a lot is happening in this area.
First of all there is pipeing on each side of the recess,
then there are the verticle pieces of red leather on each side of the
black leather at the bottom of the recess.
What you don't see is that the black on the bottom has to be a sleeve
in which
a plastic stiffener is inserted and then the sleeves for the wires that
retain the covers to the seat
frame have to be sewn on the underside too. In all there are 10
pieces sewn together
in these seat accent areas.

Back in 1967 when this machine was new you could buy all kinds of
attachments for
it to sew different details.
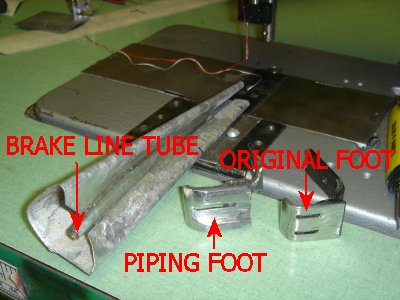
I searched on ebay and all over the internet for an attachment to make
piping.
I needed to make about 100 ft of piping and not being able to find
anything in my
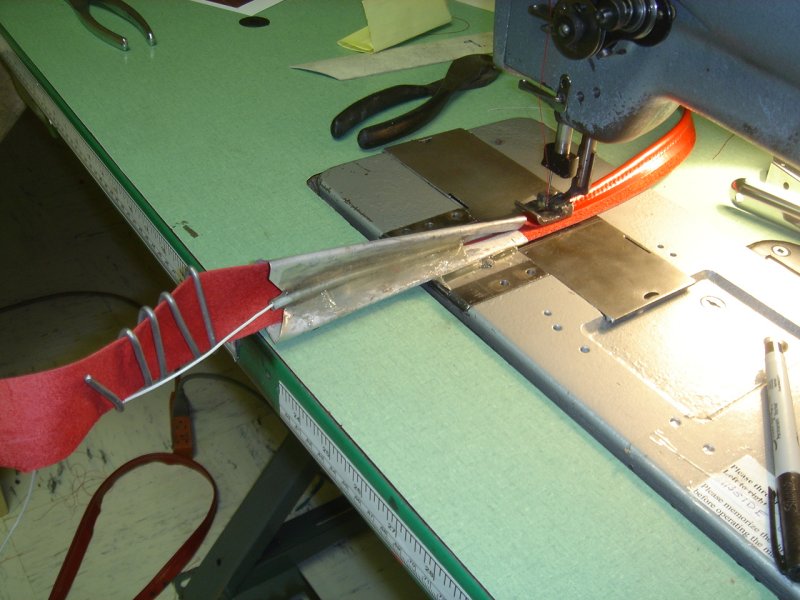
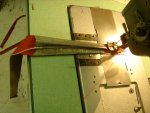
search, I proceeded to make an attachment of my own. I had to
devise a contraption that would fold
a strip of leather in half and insert a cord in the center of it
and sew it close to the cord to make the correct type of piping.
I bent a piece of sheet metal in which I could insert a strip of 1 1/2"
wide leather
and it would fold it in half. Simple enough.
I then added a section of brake line tubing so that the business end
would
insert the cord into the center of the folded leather just ahead of
where the needle would
be sticking it all together. I added the flattend out coil on the
receiving
end so the strip of leather wouldn't get caught on the edge of the
sheet metal folder.
Then I had to fashion a pressor foot so there was a grove in the bottom
that
would ride on top of the cord inside the leather and have a needle slot
right along side the cord so it would sew it tightly together.
I cut and carved the pressor foot from a piece of 3/8" thick steel,
bent a leg
for it and drilled it and inserted a roll pin to hold them together.
Singer would be proud of me.
I zipped through that 100 ft of piping in no time.


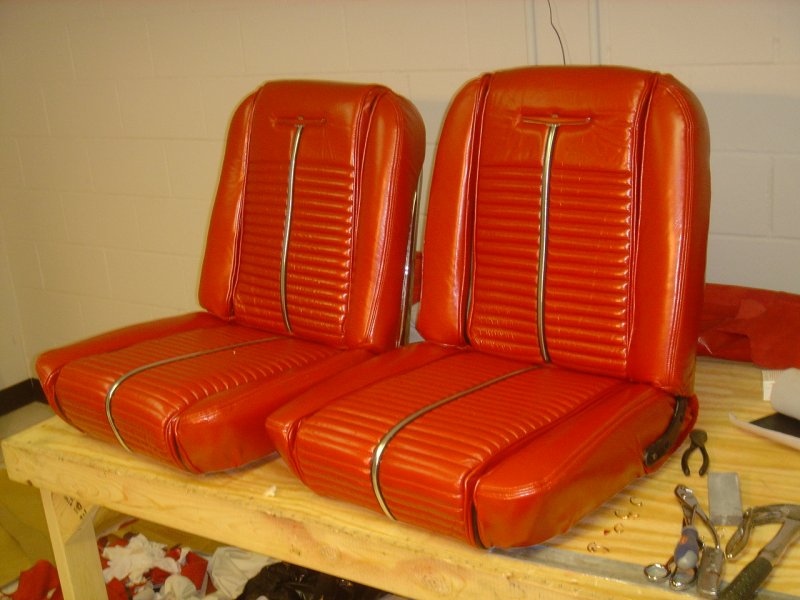
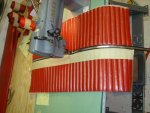
After that I assembled one of the front seat bottoms followed by the
back.
The more I did the easier and quicker it became and I went on and
completed the
other front bucket seat followed by the back seat.


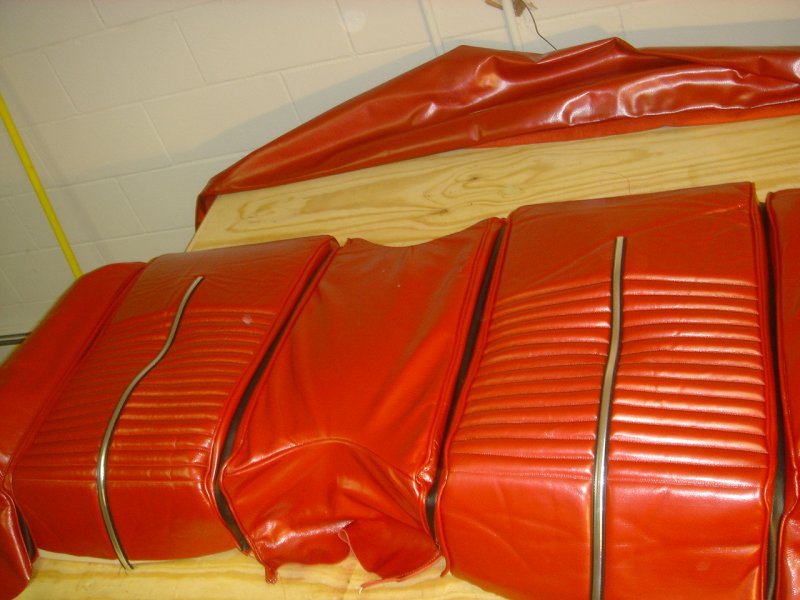
Then I sewed the headliner together, a snap after the seats, and
installed
it in the Italien.
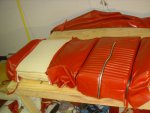
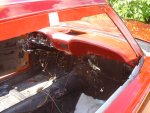
The rest of the interior parts covered with leather
were completed next and stored in my family room
until I was ready to install them in the car.

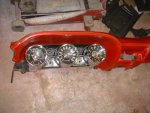
Here is the new dash installed in the car.
Back to Italien Index
Continue
with Chapter 28
Contact
Tom
Maruska
Back to
TOM MARUSKA CARS
Engine Turning